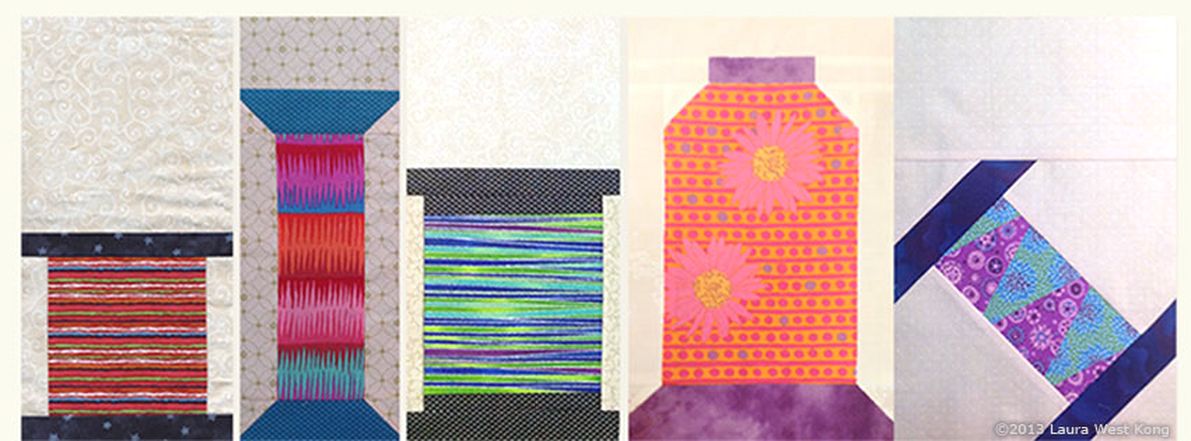
Our shelf of thread is getting full and this month’s spool is tipping over! This block has a foundation paper-pieced center that is quick and easy, a great introduction to foundation paper-piecing. Or if you prefer, cut the thread fabric from a single rectangle of striped fabric.
Click here to download the full-size foundation paper-piecing pattern.
The pattern fit 3 times on one page. If you’re making more than 3 blocks for a block exchange, you’ll have to print more copies.Block size:
8-1/2″ x 12-1/2″ (8″ x 12″ finished).
You’ll need…
Thread fabric:
(1) 3-3/4″ x 6″ rectangle A*
(1) 3-3/4″ x 6″ rectangle B*
*Alternately, you could use a 3-3/8″ x 6-1/8″ rectangle of striped fabric in place of the foundation paper-pieced unit.
Spool fabric:
(1) 5″ square
Background fabric:
(1) 7″ square
(2) 3″ squares
(1) 8-1/2″ x 4-1/2″ rectangle
Note: Use a short stitch length when sewing on the paper to perforate the paper for easy removal.

2) Cutting and marking the half square triangles.
1) Print pattern at 100% and cut on the solid outer line. Note: The solid outer lines should measure 3-3/8″ x 6-1/8″ with 1/4″ seam allowances shown by the inner dashed lines. Fold and unfold on all the dashed diagonal lines to make creases.
2) Cut the 7″ and 5″ squares on a 45° diagonal from corner to corner to make two half square triangles (HST) from each. Note: You may want to starch these squares before cutting into triangles to help tame the bias edges. Draw a 45° diagonal line from corner to corner on the reverse side of each of the 3″ background squares.

3) 1/4″ seam allowance over the diagonal line between 1A and 2B.
3) Place rectangles A and B right sides together (RST) and pin them to section 1A on the printed side of the paper pattern, with their 3-3/4″ side centered along the diagonal line between 1A and 2B, and with 1/4″ seam allowance extending over the line.
Note: It doesn’t matter which fabric you use as A and which as B. The pattern is symmetrical and you can turn it either way, depending which fabric you want to be at the top of the spool and which fabric you want to be on the bottom.

Sew on the line between 1A and 2B. Press open and trim excess fabric. First along the 3-3/4″ edges and then along the left/right edges. Add a 1/4″ seam allowance when trimming along the diagonal lines.

4) Place the cut diagonal edge of the remaining fabric A centered along the diagonal edge of fabric B on your pattern, RST. Pin fabric to section 2B and sew along the dashed diagonal line between 2B and 3A. Press and trim as before, first along the diagonal line with a 1/4″ seam allowance and then along the outer edges.


5) Repeat step 4, alternating fabrics A and B until the entire pattern is filled. Note: When trimming section 4B, trimming from the side first rather than along the diagonal line will give you a larger piece to use for section 6B.
6) Finger press a small crease in the center of the long side of one of the 7″ background HSTs. Align the triangle’s center crease mark with the gray center mark of one of the long sides of the paper-pieced thread unit, RST. Pin and sew along the long gray dashed line. Repeat on the other long side of the paper-pieced thread unit with the remaining 7″ background HST. Press seam allowances toward the background triangles. Trim excess background fabric even with the edges of the thread unit.

7) Place one of the 5″ spool HSTs and one of the 3″ background squares RST as shown. Sew along the drawn diagonal line. Repeat with the remaining spool HST and background square. Press as shown. Trim excess fabric to reduce bulk if desired.

8) Finger press a small crease in the center of the long spool fabric side of one of the spool-background triangle units. Align center crease with the gray tick mark on one of the short sides of the thread-background rectangle unit, RST.
Pin and sew with a 1/4″ seam allowance. Repeat on the other short side of the thread-background rectangle unit with the remaining spool-background triangle. Press toward triangle units.
Note: If desired, you may trim off the rabbit ears before pinning and sewing.

9) Carefully remove paper pattern and trim off the rabbit ears that are sticking out. Use a 1/4″ seam allowance to sew the 8-1/2″ x 4-1/2″ background rectangle to the top side of the spool block. Note: You get to choose which side is the top! Press towards the background rectangle.
Block size 8-1/2″ x 12-1/2″ (8″ x 12″ finished).


Next Tutorials:
Spool Quilt Block Tutorial. Block 1Spool Quilt Block Tutorial. Block 2
Spool Quilt Block Tutorial. Block 3
Spool Quilt Block Tutorial. Block 4
Spool Quilt Block Tutorial. Block 5 (this page)
Spool Quilt Block Tutorial. Block 6
Spool Quilt Block Tutorial. Block 7
Spool Quilt Block Tutorial. Block 8
Spool Quilt Block Tutorial. Block 9
Spool Quilt Block Tutorial. Block 10
Spool Quilt Block Tutorial. Block 11
Spool Quilt Block Tutorial. Block 12


Вдохновляющая подборка. Так хочу сумочку, но наверно руки не дойдут до нее в ближайшее время.
ReplyDelete