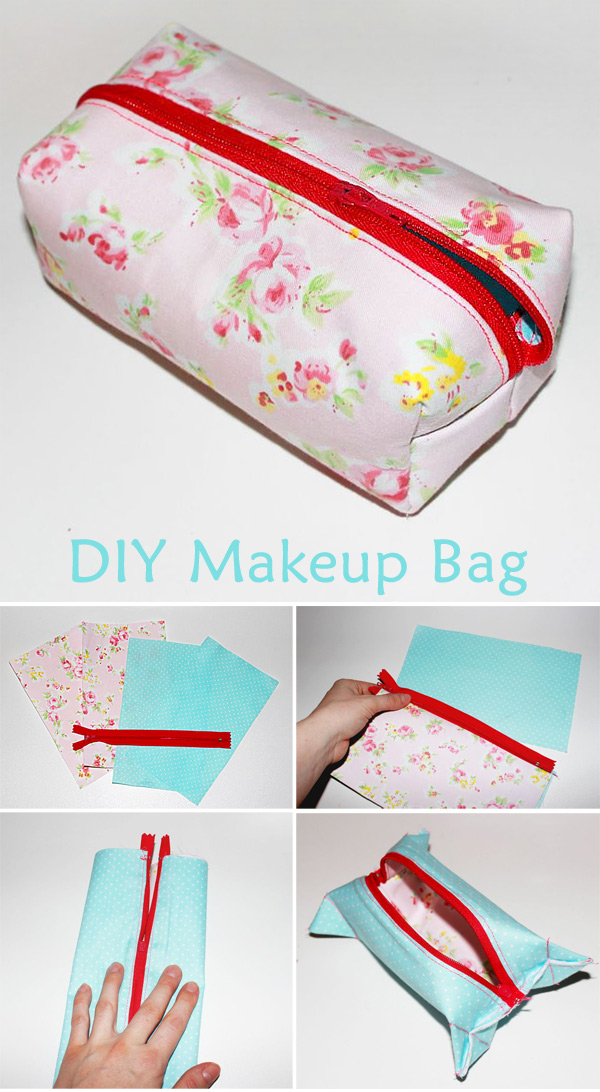
You need:
- scissors
- ruler
- zipper of 25 cm
- thread to match the zipper
- sewing machine (or it is possible to stitch by hand)
- 4 pieces of fabric, size of 25х15 cm (it is better to choose a waterproof fabric, or just dense one)
- scissors
- ruler
- zipper of 25 cm
- thread to match the zipper
- sewing machine (or it is possible to stitch by hand)
- 4 pieces of fabric, size of 25х15 cm (it is better to choose a waterproof fabric, or just dense one)
To begin with, take a piece of cloth for the right side of the bag.
Put it on the table with the face up, apply the zipper as well with the face up along the long side of the piece, then cover with the piece of fabric for the inner side of the bags with the face down and get a
Put it on the table with the face up, apply the zipper as well with the face up along the long side of the piece, then cover with the piece of fabric for the inner side of the bags with the face down and get a
sandwich as below:
Pin the sandwich.
And stitched on machine or manually.
Now turn it outside in so that the pieces joined thier inside parts ...ugh... well written :)
Smooth the blank.
Then put it on the cut for the inner side of the bag this way:
And the last piece of fabric for the right side of the bag with the face down.
Again pin all and stitch on the machine.
Now unfold the blank and admire.
Now fold it so that the inner part was outside.
Pin the side opposite to the zipper.
Stitch.
Fold this way.
Give it volume by stitching the corners like this.
Cut out the corners and turn the vanity-bag outside in!


Love this, will have a go I think, your tutorials are really good, Thankyou.x
ReplyDeletetrés jolie trousse beau pas a pas merci a trés vite
ReplyDeleteAchei lindos!!!
ReplyDeleteMuito pratico
ReplyDeleteLindo!
ReplyDelete