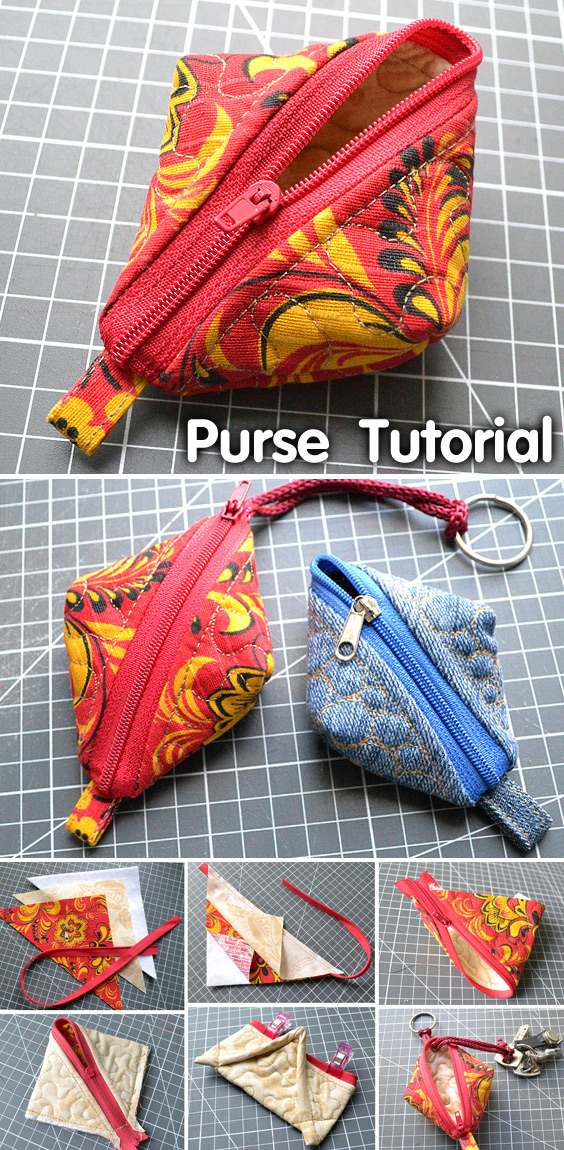
how to sew a small purse key chain
We cut out three squares with a side of 7 ": a face, a wrong side and a seal. We also need one zipper and an extra slider for it. This is a consumption for two products!
The size of the squares can be taken any, depending on the purpose: more - get a cosmetic bag, smaller - key chain.
Cut them diagonally, sever the zipper into two separate bands.
Further in tutorial I will use only one set.

We put together the front part with a seal and stitch the band "zipper":

Add the wrong part and once again lay the seam, a little closer to the "teeth" of the zipper:

Turning away the wrong part, ironing, stitch on along the "zipper" and quilting:

Using a ruler, we check whether the triangle is preserved rectangular and isosceles. Otherwise, we trim it slightly.
Next - a ticklish moment: insert the lightning slider. Not as scary as it seems, but dexterity is required. To begin to singe the ends of the zipper tape over the fire, and then, slowly, alternately inserted into the ends of the slider tape.


Turning inside out (leave the zipper ajar!), Combine the corners and turn into a square:

Trim excess fabric, turn over fabric sections

You can stop at this stage, or you can create a volume for the bag and make corners.

Wrench bag:

All small purse is ready.
I decided to turn this purse into a key holder:

I pulled the cord and secured the keys


Next to the purse with the size of the square-billet 6 ", for comparison:

In such nice things you can wear headphones, coins, some other little things inside. Well, the keys, as you can see. And also good as souvenirs.


0 comment:
Post a Comment