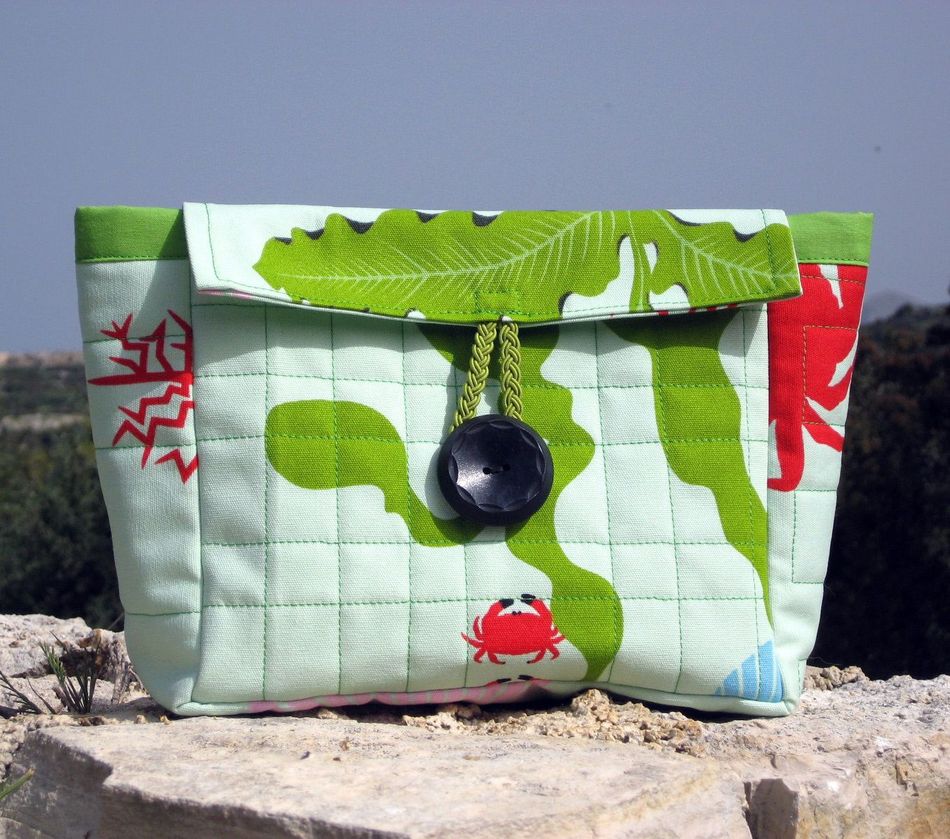
The outside fabric is ‘canvas’ = quite firm fabric and great for bags. That I have quilted with fleece and thin cotton. Inside the lace is made with ‘normal’ cotton. So all this makes the bag strong and it keeps well the ‘box’ shape.

Lets start! Fabrics that I have used for these bags, are from Ikea. They are a little bit thicker fabrics like ‘canvas’ which is great for bags.
CUTTING
First we cut all the pieces we need. If your fabric has some cute and funny pictures, take care how to cut your pieces so, that you can have those special parts of the fabric in a place where you like.
These pieces we cut from the main (print) fabric, fleece and thin cotton:
- front piece 8″ x 6,5″
- back piece 8″ x 6,5″
- bottom & sides 21″ x 4″

Pieces for the lining are:
- front 8″ x 6,5″
- back 8″ x 6,5″
- bottom and sides 21″ x 4″
- pocket 8″ x 6 1/4″
Piece for the cover (valve) from the main fabric: 6,5″ x 8,5″
Binding: 3″ x 24″ (about 23″ but I cut a little bit more to be sure that it’s long enough)

SEWING
Pin all three materials (print, fleece, thin cotton) together.Quilt as you like and trim the edges.

Now find the middle of every piece. Start to pin the front piece to the ‘bottom & sides’ piece from the middle and continue to the sides.


Sew this and then do the same for the back piece. Corners are a little bit difficult – sew slowly and move your fabric so that you can turn in the corner.

Then we make the cover. If you like to put a label, sew that first. Then fold the piece double and sew two short sides. Before you close the long side, add the loop for the button. I made the loop with hair-loop.

LINING
Sew first the pocket. Fold the piece double, sew two sides, turn around and sew the last side to close ‘the pouch’. Then sew the pocket on its place.

Catching the bag with the lining, I begin from the side seams. Like that it’s easy to get the lining in the right place.

BINDING
Fold double the piece for binding and iron it. Pin it inside the bag. Now you have there the bag, lining and the binding all together.
Cut the binding for the right lenght and sew the edges. (You need to remove some pins and then add them again after sewing the edges). Sew around from inside.

Now it starts to look like a great fabric basket …

Now turn the binding outside and pin it around.

Pin the ‘cover’ piece with the binding on the backside.

Sew all around and there you are …

Well done! Your ‘2 in 1′ make-up bag is almost ready! Only button is missing and I guess that you can find from you ‘button tin’ … find a big one!


This make-up bag / basket is so wonderful! I’m surprised how great it became – and really practical! As you can see I have made already many of them.


I hope this tutorial helps you to make your bag!


0 comment:
Post a Comment