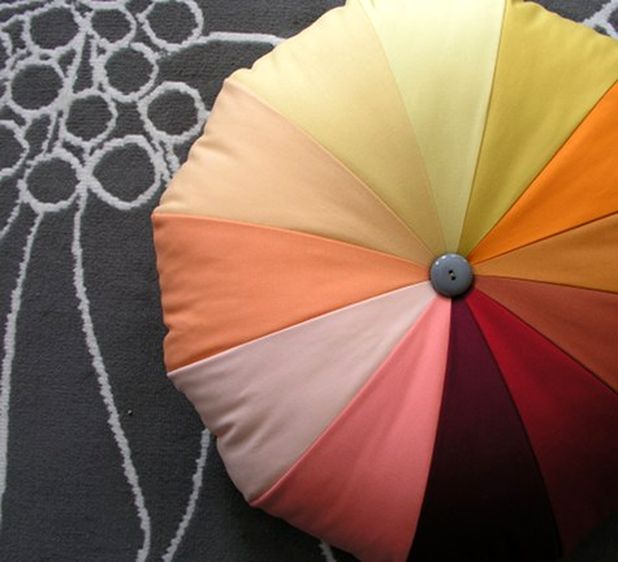
Add a burst of color to your room with this crafty pouf! At 17” wide and 10” deep, it’s large enough to serve as floor seating or a foot stool. (And if you have pets, I have a feeling they may want to make this their new favorite spot!)
This project is a little challenging to sew, but it’s not too difficult, so if you’re comfortable with the basics of sewing, give it a try. You can make a color wheel effect with a range of solid colors, or choose a variety of patterned fabrics for a louder patchwork effect. Medium-weight cottons work well for this design (check out quilting shops for great selections of solids and prints).
I love the idea of making a set of these poufs in a range of sizes, for a sculptural stack of cushions that will become a room element in their own right. Or if a pouf isn’t your thing, you can make this in a smaller size for a cute throw pillow for the sofa or bed. Let’s get started!
Finished Dimensions: 17” diameter by 10” tall
What You’ll Need
¼ yard each 12 coordinating fabrics (I used quilting cottons)
1 yard muslin
3 pounds fiberfill stuffing
2 large buttons (approximately 1 ½”)
2 flat metal washers, slightly smaller than your buttons
12” upholstery needle (get this where upholstery supplies are sold)
fishing line
sewing thread
hand sewing needle
sewing machine
sharp scissors
iron
1. Print the template
DOWNLOAD TEMPLATE HERE
Download and print the template above. This template will work if sized to any dimension, so you don’t have to worry too much about getting it to print to the exact size specified. (And if you prefer a smaller or larger pouf, just size the template accordingly!)
2. Cut & Arrange the Fabric
Using the template, cut 2 pieces from each of the 12 fabrics, and 24 pieces of muslin.
Arrange one piece of each of the 12 fabrics in the order you plan to assemble them.
3. Assemble the Wedges
To stabilize the fabric and discourage stretching, a piece of muslin is sewn behind each piece of colored fabric. To do this, just align a piece of muslin on the wrong side of each piece of fabric, then sew them together as one as you assemble the pouf.
To sew the first two wedges together, make a little fabric sandwich with a piece of muslin, the first wedge right-side up, the next wedge right-side down, and another piece of muslin. Pin all four layers together along one side.
5. Sew the Wedges
Beginning at the wide end of the wedge shape, sew the layers together using a ¼” seam allowance. Sew a gradual curve along the angle at the base of the wedge (rather than sewing a distinct point). Stop the seam when you reach the point.
6. Iron
Iron the seam, pressing the seam allowance to one side.
7. Sew the Remaining Wedges
Place the piece you’ve just sewn right-side up on your work surface, and align the next color wedge right-side down, then place a piece of muslin on top of it. (Be sure to take a moment and double-check that you’re assembling the pieces in the correct color order; I found it was easy to get mixed-up and accidentally sew the pieces in the wrong order!)
Continue to assemble the wedges in this order until you’ve assembled six wedges for a half-circle. Then, assemble the other half circle separately. When both half circles are assembled, place them together along the straight edge, and sew them together. (Assembling them in this way ensures that you won’t have a hole in the middle where all the points meet.)
8. Sew the Other Half
For the other half of the pouf, you must arrange the colors in the opposite direction as you did for the first half. To test if you have the order correct, layout the pieces in the reverse placement, then place the first half right-side down on top of the pieces to be sewn. If the colors are matched up, you’ve got it right.
Sew the wedges for the second half in the same way you did for the first half.
9. Join the Two Halves
Pin the two halves with their right sides facing together, aligning the pieces so that the seams meet.
10. Join the Two Halves
Sew the two pieces together around the perimeter, ¼” from the edge. Leave an 8” opening to stuff the pouf, backstitching at the beginning and end of the seam so that it doesn’t unravel during the stuffing process.
11. Iron the Seam Allowance
Turn the fabric under ¼” on each side of the opening and press. (Folding and pressing this edge will make it easier to sew the opening closed after the pouf is stuffed.)
12. Stuff the Pouf
Stuff the pouf, pulling off handfuls of stuffing and adding them in smallish clumps (to avoid a lumpy appearance, it’s best to add the stuffing little by little). Take care to spread the stuffing into the far edges of the pouf so that each nook and cranny is fully stuffed.
When the pouf is nice and firm, sew the opening closed using a hand-sewing needle and matching thread.
14. Make the Tuft
(SAFETY NOTE: Be very careful when working with the long upholstery needle. I nearly poked myself in the eye as I struggled to push the needle through the pouf while leaning over it to observe – yikes – NOT a good method! Always insert the needle AWAY from yourself, not toward yourself!)
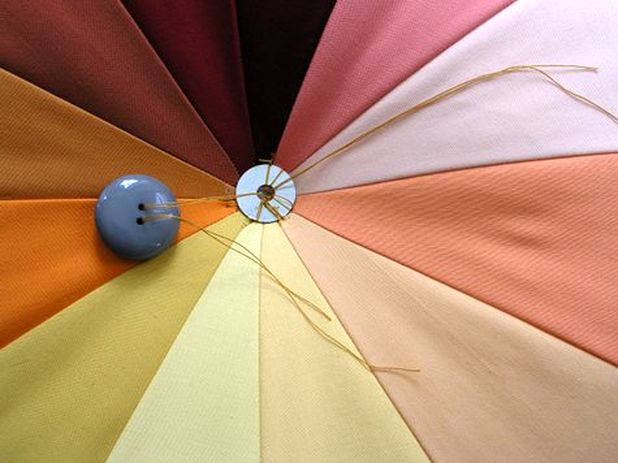
In this step, flat metal washers are used to hold the tufting in place in the center of the cushion. The tufting is sewn with fishing line because regular thread is not strong enough to withstand the pressure of the tufting. The buttons, which are decorative only, are added later.
Thread an approximately 60” piece of fishing line (here I’m using heavy thread since fishing line wouldn’t show in the photos) through the long upholstery needle. Tie both ends of the fishing line onto one of the washers and loop it through the washer twice.
Insert the needle all the way through the center of the pouf, so that the washer lies flat against the center point of one side the pouf. On the other side, loop the thread through another washer.
Looping through the center and around the edge of the washer, insert the needle back through the pouf and out through the center of the other washer. Pull the fishing line tight while pressing down on the top washer to create the tufted effect. Keeping the tension, insert the needle around the washer and back through the other side. (It’s helpful to have someone else lend a hand at this stage, though it’s not impossible to do yourself!)
Make a few passes with the needle and fishing line, each time looping through and around the washers. Tie off the line on one side, knotting it onto the washer.
15. Add the Buttons
Cut an approximately 30” piece of matching thread and loop it through the upholstery needle, doubling it. Insert the needle through the pouf, going through the center of the washers. Next, loop it through a button, then back through to the other side of the pouf. Finally, loop it through the other button. Tie the threads in a knot so that the thread is pulled taut and the buttons are nestled against the washers.
And poof — you’re done!


0 comment:
Post a Comment