A Vintage Inspired Boxy School Bag! Free Sewing Tutorial and Pattern.
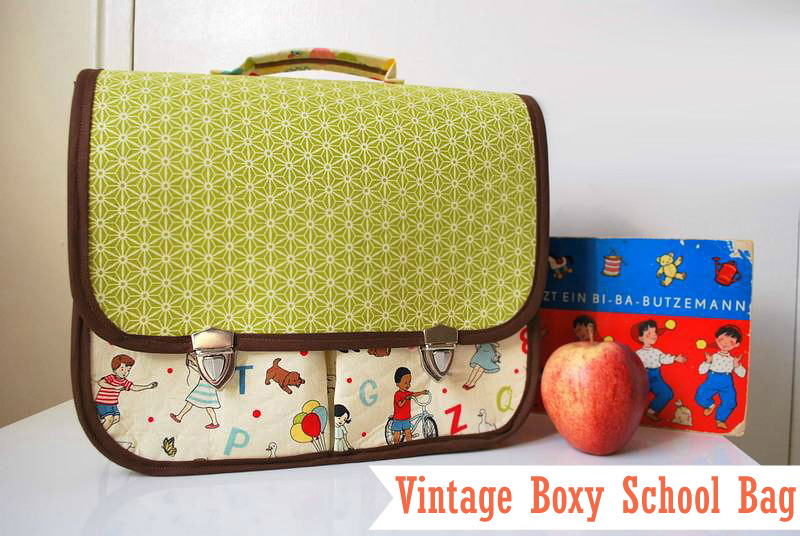
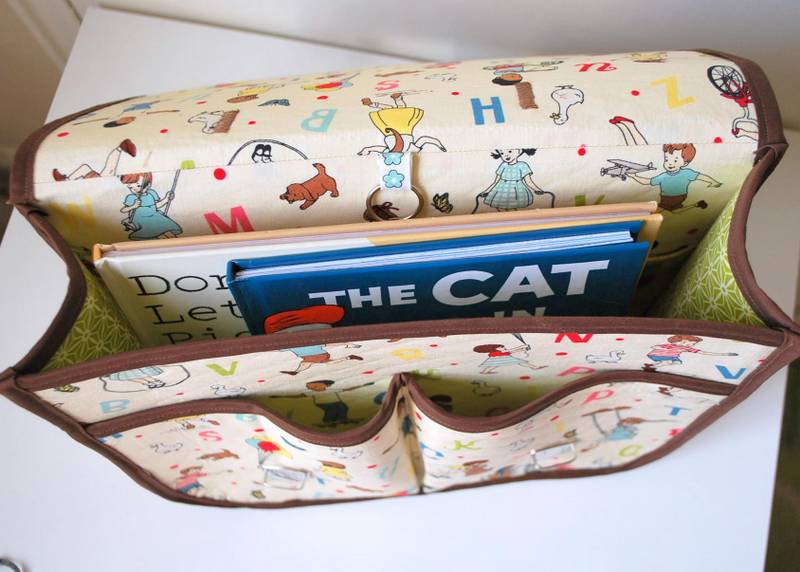
I grew up in East-Germany and every school child had a special school bag called "Schulranzen". When I saw October Afternoon's Sidewalks, I immediately wanted to make one of those vintage inspired school bags. Usually they are made from leather, so I gave myself an extra challenge to make it with fabric.
This is an intermediate skill level pattern and you have to be able (or your will learn as you go here) to stitch around a curved seam with several thick layers of material. So here we go.
Supplies:
1/2 Yard of Sidewalks Main Cream (fabric 1)
1/2 Yard of Sidewalks Geometric Green (fabric 2)
1 Yard of Sidewalks Marbles Cream* (fabric 3)
1/2 Yard of Pellon double sided fusible ultra firm stabilizer
2 Packets of chocolate brown double folded bias tape
Coordinating Thread (Chocolate Brown and Cream with matching boppins)
40x30mm Metal Algam Lock Buckle (I found mine on Amazon)
4 book binding rings or key rings
Water soluble pen
Sewing Machine, Rotary Cut, Cutting Mat, Pins, Iron
Pattern Download
* If you do not care that the marbles line up in one neat line on the strap, you can just buy 1/2 yard.
General Tips: Assume a 1/4" seam allowance unless otherwise noted, pin plenty (I am not very good at that!), always clip your threads right away, start and stop with a back stitch and measure twice and cut once. :)
Okay, now that we gathered all supplies, lets get started.
1) Preparing the pattern
Print the pattern on letter paper with no scaling etc. Tape it together matching the bulls eye marks and the matching letters. Cut it out along the lines - seam allowance is included.
You should have:
1 Main Panel Sandwich
1 Font Panel Sandwich
1 Font Pocket Sandwich
1 Inside pocket
2 Back Straps
2 Side Panel Sandwiches
PLEASE NOTE:
For directional fabric for the main panel: you will want to cut the two halves of the larger main panel piece (thick lines on the pattern) out for all directional prints
Use the smaller pattern piece of the main panel piece (thinner line on the pattern piece) for any non-directional fabrics and the pellon.
The pattern pieces for the inside pocket and front pockets are overlapping. It helps to first cut the larger one (the front pocket piece) and later cut the piece on the side off to make the pattern piece for the inside pocket.
2) Preparing the fabric sandwiches
Steam iron all your fabric. Trim selvages - this fabric has such cute selvages, I actually used it.
NON-DIRECTIONAL FABRIC: Layer your fabric sandwich with fabric 1, pellon and fabric 2 and fuse them together according to manufacturers instructions. Then lay out and cut the pattern pieces for the main panel (please see the note for directional prints), the front panel, the side panels and the front pockets.
DIRECTIONAL PRINT: Cut out the panel halves from the larger main panel pattern piece from the from fabric 1, lay them right sides together and stitch along the middle line (the straight edge) to create a full panel piece as in the pattern. I wanted to include a key ring in the inside of the bag so I stitched a loop of selvage in there as well. Stitch over the selvage loop a couple of times to make it more sturdy.
Press seams open.
Now you can proceed with your fabric sandwiches. Your main panel should look like this.
3) Attach Bias Tape
Now that you have the fabric sandwiches for the front panel, front pocket, side panels and main panel, its time to pretty them up. Using brown thread in your machine, carefully stitch bias tape on ONE short end of each side panel (that will become the top), the top of the front panel and the top of the front pocket.
Then stitch on the bias tape on the main panel starting 1" before the middle and ending 1" after the middle line to make later a nice finish.
The side panels should look like this.
4) Finish the side panels
To finish of the side panels, zig zag along the other short end of each panel. Now place the side panels together with fabric 1 facing each other. With a 1/4 seam allowance, stitch together the now zigzaged short ends and press them open - creating one long strip. Top stitch so they stay down.
5) Finishing the front
Align the bottom of the unfinished side of the front panel and the front pocket piece so the middle matches up. Mark that middle line (use pattern piece for guidance) with a water soluble pen and top stitch down the middle attaching the pocket piece on the front panel. Then fold and pin the pockets in place. Now the sides should match up as well. Stitch or zigzag around the pocket with a 1/8 seam allowance to secure it.
It should like like this.
6) Inside Pocket
Take the inside pocket piece and iron it, wrong sides stilled folded together. Top stitch the top of the pocket.
Then baste it with a 1/8 allowance on the unfinished part of the main panel facing the inside (fabric 1).
7) Attaching Side Panels to the front
Now that front, sides and back are finished we need to assemble the bag. This is the trickiest part, so go slow and don't get frustrated. Pin the side panels starting on one side and use a lot of pins in the curved seams.
When I stitch curved seams it helps me to approach them from each side separately. Maybe you want to practice on a leftover scrap part from the sandwich first since its many layers. Go slow and leave the needle in when you turn the fabric slightly. With a 1/8 seam allowance and something close to it, stitch all around, removing the pins as you go. Begin and end with a couple of back stitches to make your bag more durable.
Once you got around, make sure you got all seams properly.
Then attach the bias tape using brown thread again and a 1/4 seam allowance. Start by folding the beginning of the bias tape over (about 1/2") and clip a little in the center to reduce bulk.
Then pinch it in between the layers.
Your finished front panel should look like this.
8) Finishing the back panel
I used the selvages to make the attachments for the rings to hold the back straps because they were so cute! So, just cute 3 1.5" selvage strips, fold in half and pin on the back panel (see marks on pattern for guidance).
For the top one, I pinned it the opposite way, used a very tight zigzag to secure it and then folded it over the zigzag (to finish it off nicely) into the right way I wanted it. Then I secured it with a top stitch in both directions.
Then baste the back panel and the front part together with a 1/8 seam allowance using the method used before - with lots of pins!
Then attach the bias tape to finish off the bag.
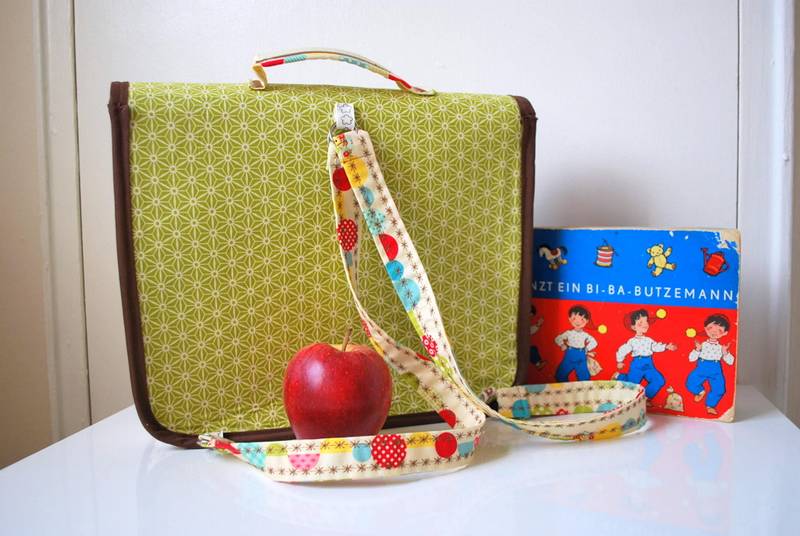
9) Making Back Straps
Create a double fold bias tape out of the strap pieces by folding it in half wrong sides together and ironing it. Then fold to outside raw edges into the middle and iron again.
Then top stitch on both sides or use a decorative stitch that you like.
Fold the ends over 1/4 twice and create a look of about 3/4". Then stitch in place several times.
10) Making the handle
Take a 4"x1" scrap piece from the fabric sandwich and fold it into another scrap piece measuring 3"x8".
Fold the raw edges inside.
Satin stitch on the top of the handle as well as when you stitch it to the bag using the marks on the pattern.
11) Attach hardware
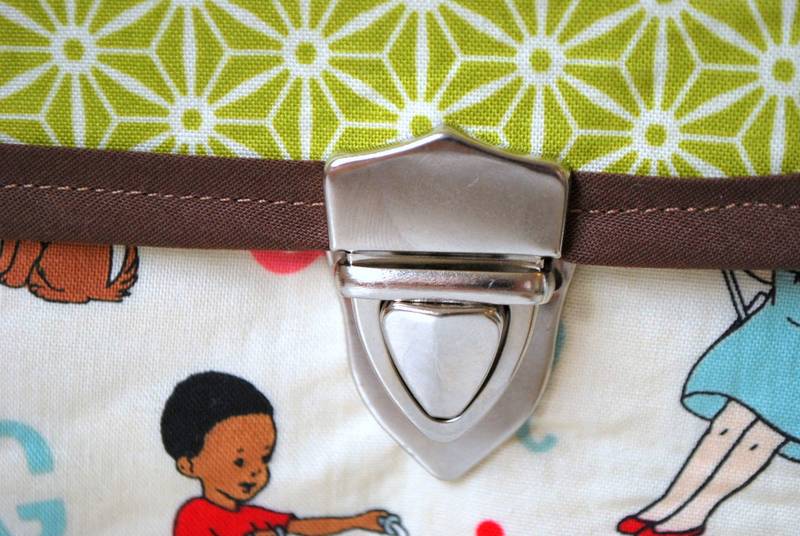
Now all you have to do is attach the hardware on the front pockets and main panel. Mark the spots (see pattern) for the slot piece of the buckles on the front pockets and super carefully cut with a seam ripper small holes into your pockets. Push the prongs through and push in the metal plate from the other side. Push the prongs down on the metal plate to secure it. The other side is even easier. Just carefully bend open the ends, slide it over the main panel (see pattern for marks) and push it closed.
Your bag is finished
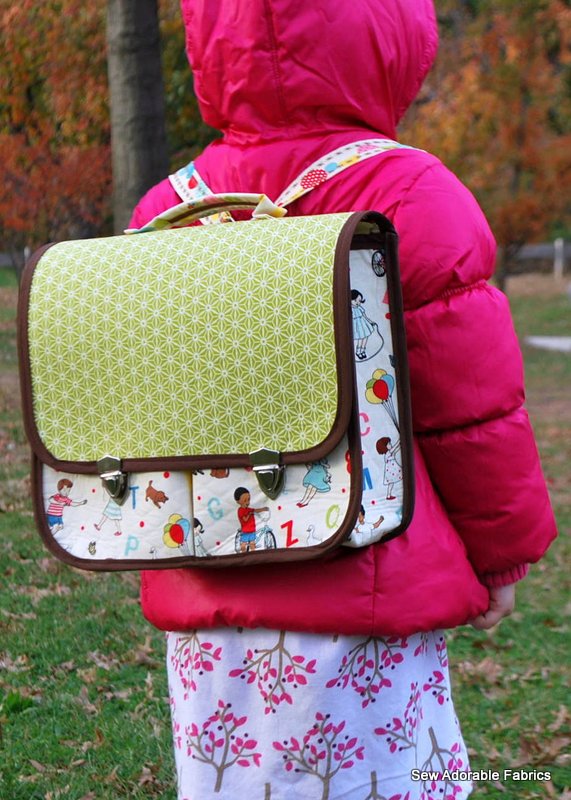
I am so happy you stuck with me through this long tutorial! I absolutely love this bag and my almost kindergartner adores it too!




0 comment:
Post a Comment