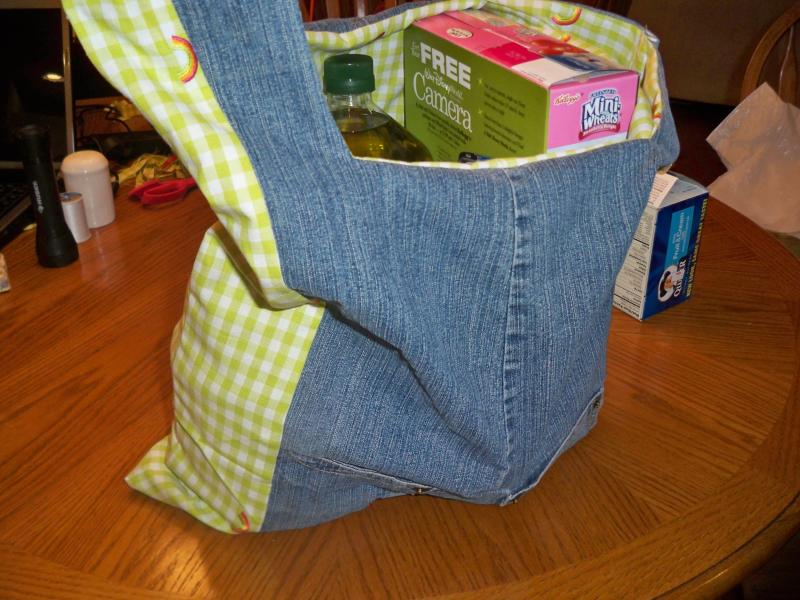
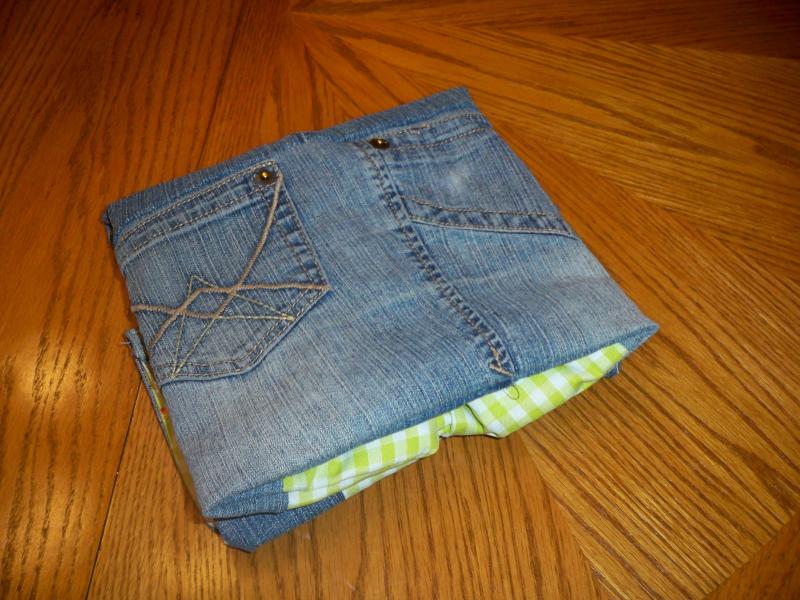
Learn how to make a Reversible Grocery Bag from your old jeans and making a pattern from a standard plastic grocery bag! DIY Sewing Tutorial
Step by step instructions on how to make a Reversible Grocery Bag from jeans.
Tools Needed:
Plastic Grocery Bag (Target bags are really good because they’re durable)
Pair of Jeans
Another Material (2-3 yard will probably be more than sufficient)
Scissors
Thread
Seam Ripper
Pins
Gather your supplies.
Start ripping out the seams down the inner seam of each leg (starting at the zipper).
Now you should start to have more of a flat surface to work with.
Cut the zipper apart where you can’t rip anymore seams.
Clean up the excess thread you just ripped out. A lint remover helps out a lot here.
Now you have your flat jeans to work with.
Next we are going to prepare the bag to use as a pattern.
Cut off the bottom seam of the bag.
Then cut off the top handle seams.
Flatten the bag so that half of the front is showing and half of the back is showing.
Cut down the side seam that is already there from the bag originally (it’s hard to see the seam in the picture).
Now you have two halves of the grocery bag.
Take one half to work with first.
Square off the top handles if they aren’t already.
Open it up for use as one part of the pattern.
Now take out the other half of the grocery bag.
Square off the top handles of this one as well.
Cut down the seam that was already there.
Now you should have three pieces of this one.
Fold the jeans you prepared above in half.
Cut off the rounded part that was on the back of the jeans.
Pin this same seam all the way down the jeans to prepare to sew.
Use sewing machine to sew down this line.
Sew in a straight line, all the way past the back area you just cut off.
Lay out the jeans again and cut the waste off.
Throw the waste part aside and you’ll be working with the rest.
Place the second bag pattern under the jeans where the pockets are. We are going to size up how much of the pattern will be for the pockets.
Leave some room below the pockets for seam allowances. The pockets will be on the bottom of the bag.
Cut the pattern down this line.
Now you have two pattern pieces from this one. The top one will be made from the legs of the jeans and the bottom rectangle one will be from the pockets.
Pin the rectangle pattern over the pockets on one side.
Pin the other piece of the pattern on the legs with the leg seam running right down the middle.
Cut them out.
Lay the first pattern down on the other side of the jeans to get the other side cut out the same.
Now you have two pieces of the bottom.
Remove the pattern from the pocket part of the pattern and lay it on top of the other pockets on the other side so it’s mirroring it.
Pin and cut out so that it is as similar as possible.
Pin the bottom half of the bag (with the pockets) to the top half right sides together and so when you flip the pocket part over, the pockets will be facing up.
Sew down these lines.
Now you should have two pieces with the pockets on the bottom.
Get out your extra material and fold it so that you have four layers and you are going to work with the side that has the folds (so you have two folds).
Fold the other pattern (that you set aside earlier) in half and lay on the edge of the two folds.
Cut along the pattern, leaving room for seam allowances.
Now you have the two “lining” pieces cut.
Use the other two pieces that you cut out in the second bag pattern and cut two of each with the same fabric.
To give you and idea of where we’re heading here you can see that the “lining” piece is a solid piece, but the jeans side will have two strips of the “lining” fabric down both sides. The reason we did this was because the jean fabric wasn’t wide enough to just use that, but also it add some character.
Lay the two pieces you just cut out on each side of the two jean pieces with right sides together.
Sew them together down the outside line.
Flip over so you can see that it creates one large piece now.
Lay the jeans side and a “lining” side on top of each other with right sides together.
Pin the “U” part and the to outter curves.
Sew where you pinned on the sewing machine.
Now you have the top half sewn together (but not the very top of the handles).
Cut a knotch in each corner to prevent bunching.
Once you have done this with both pieces, flip both right side out and lay together with the “lining” fabric together.
With the handles of one side together fold over twice to make a nice looking seam to sew.
Pin this seam to keep it in place.
Sew down one line as close to the edge as possible first.
Then sew a second line that’s close to the other edge on the reversable side.
Once you have both of the handles done, lay both pieces together with right sides together and pin all the way around the entire bag.
Sew all the way around, but leaving one small portion opened so you can flip it right side out. I left the opening on the bottom seam of the “lining” fabric.
Flip right side out.
Your opening should not be sewn at this point. Fold the fabric inside itself to create a seam.
Hand sew this small piece.
Put one side into the other and your bag is now fully reversable! It’s a pretty large bag that can fit a cereal box (width wise), large bottles, and cans.
It’s also very cute and the colors I chose will be great for spring and summer.
Folding The Grocery Bag:
Lay down flat first.
Fold the two sides in so their seams meet in the middle.
Fold the top handles down.
Fold over and you have a nice little square.
You can also do it this way as well. Lay it down flat.
Fold in half.
Fold the handle down.
Fold into a square that will easily fit in your linen closet or purse!


0 comment:
Post a Comment