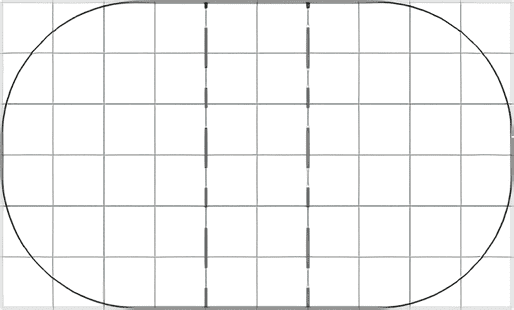
The version of the shell bag is very simple, it is an oval shape. The picture below is the paper pattern ratio (6 →10) of the shell bag in this tutorial. The size I use is 18cm *30cm.This oval shape can be very random, you can widen or lengthen it, so that the shape of the package is flat or high will change with it~~
1. Draw the paper pattern.
2. Cut a piece of each of the table cloth, lining cloth, adhesive cotton, and cloth with double-sided tape into a rectangle instead of an oval, slightly wider than the paper pattern.
3. Lay the glued auxiliary cotton adhesive side up on the ironing board, put a tablecloth on top of it (reverse side down), and iron the adhesive with a heated iron.
After that, turn over the table cloth and auxiliary cotton bonded together, lay double-sided tape on top and then lay the lining cloth, and also use the iron to iron the bond →>
The use of adhesive cotton and the main purpose of double-sided tape is to be table cloth, cotton and lining cloth bonded to each other to save the trouble of sparse sewing, in addition to the use of adhesive cotton lined bag compared to the use of non-adhesive cotton lining bag will be a bit more straight. 4.
4. in the table cloth on the line for the press line to prepare, here is drawn a wide (3.0) a narrow (0.7) tic-tac-toe grid →
5. Pressing along the drawn lines →
6. Trim an oval shape according to the paper pattern and draw the center line on the tablecloth (useful later). Then cut some diagonal piping strips with a width of 3 cm, lay the piping strips on the tablecloth and sew them together, preferably choosing the center of the side (which is inconspicuous) as the starting point, leaving a cut at the head of the piping strips→
The piping strips can be secured with a bead pin before sewing, but I usually don't use it. Align the piping strips and the edges of the bag while sewing, while maintaining a uniform width of the sewing portion (about 0.7cm).
7. Pause near the beginning of the stitching circle, fold the end of the piping strip and the head of the position of the line, and then extend it by 1.5cm before cutting →
8. Fold the end of the piping strip inward by 0.7 cm, then lay the head on top and align it with the edges, and continue sewing to the beginning of the end.
Shown here is a more convenient method of joining the head and tail of the piping strips, with the tail end at the bottom and the head at the top for smooth sewing at a later stage, or, if you are left-handed, with the head of the piping strips folded at the bottom and the tail at the top.
If you are a left-handed person, fold the head of the piping strip down and the tail up.
9. Sew the head and tail of the piping strips together using a hidden needle seam→
10. Turn the wrapping over to the opposite side and fold the piping strips over the edges while sewing with a hidden stitch.
Finish stitching of piping strips →
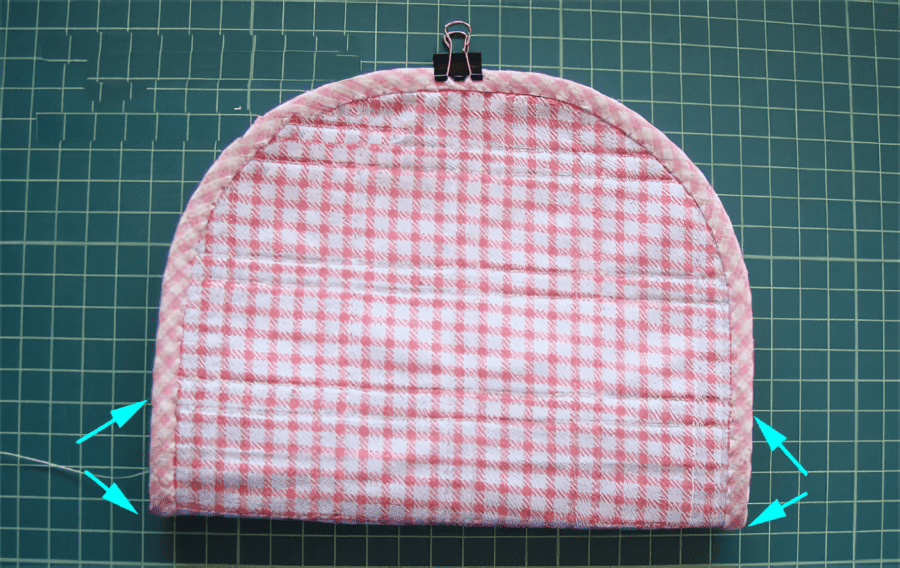
11. Fold the bag in half and sew the side edges together from bottom to top at a distance slightly longer than the 1/2 length of the expected bottom of the bag. If the zipper you are using is not long enough, you can extend the sewing distance here a little more →
12. Now let's make the bottom corners. Fold the sewn side edges inwards so that they are in a straight line with the center line of the bottom of the bag (previously drawn) and secure with a bead pin. Measure 1/2 the width of the bottom of the budget bag inwards from the bottom corner and draw a vertical line. The width of the bottom of the bag is customized, in this case 6cm, so measure 3cm inwards from the bottom corner and draw another vertical line. After drawing a vertical line on both sides, sew along the line →>
Turn over to the front to see the bottom of the bag forming →
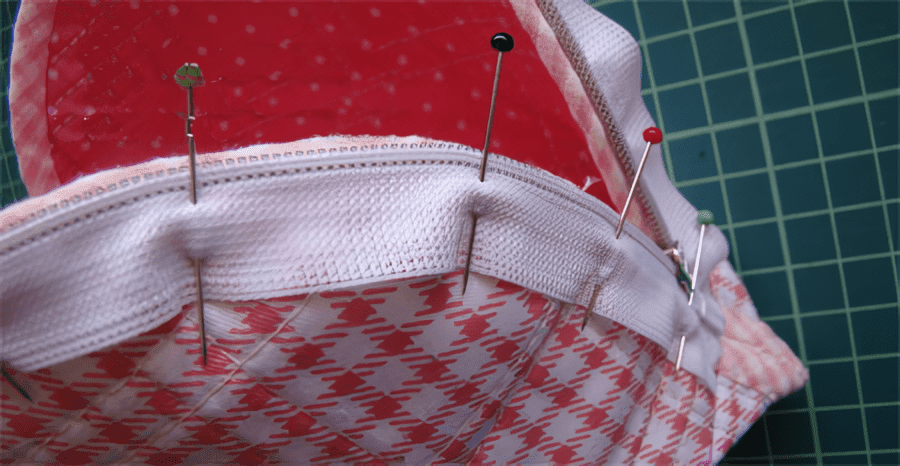
13. The final step is to install the zipper, which is the key to the beauty of the bag. The bag back to the reverse side, the zipper open, front side down, one side of the open end with bead pins fixed on the right side of the bag, and then gradually positioned from right to left, pay attention to the edge of the teeth of the zipper and the edge of the mouth of the bag to maintain a distance of about 0.3 centimeters so that after the completion of the zipper will not be very visible →
14. After positioning, then hand sewing needle for sewing, also from right to left, sewing position as close as possible to the zipper teeth, the same purpose is to zipper hidden. The zipper is the force of the bag must be sewn firmly, I use a half back stitch, half a step back from the top, and then from the bottom of the sewing one step forward, the needle from the bottom through to penetrate a few more layers, preferably through the auxiliary cotton layer, but do not go through the front of the piping strip, or it will be exposed ~
15. After sewing one side of the zipper, use a hand sewing needle at the end to sew the zipper teeth around a few times as a zipper stop, and then use lace cutters to trim off the excess zipper.
16. Continue fixing the other side of the zipper, which should be aligned with the side already sewn, by aligning the head and tail, then the middle, and then the rest of the zipper. Sewing is also done from right to left.
17. To make the zipper fit better, hand-sew the edges of the zipper to the lining. There are also two bottom corners that can be sewn to the bottom of the bag.
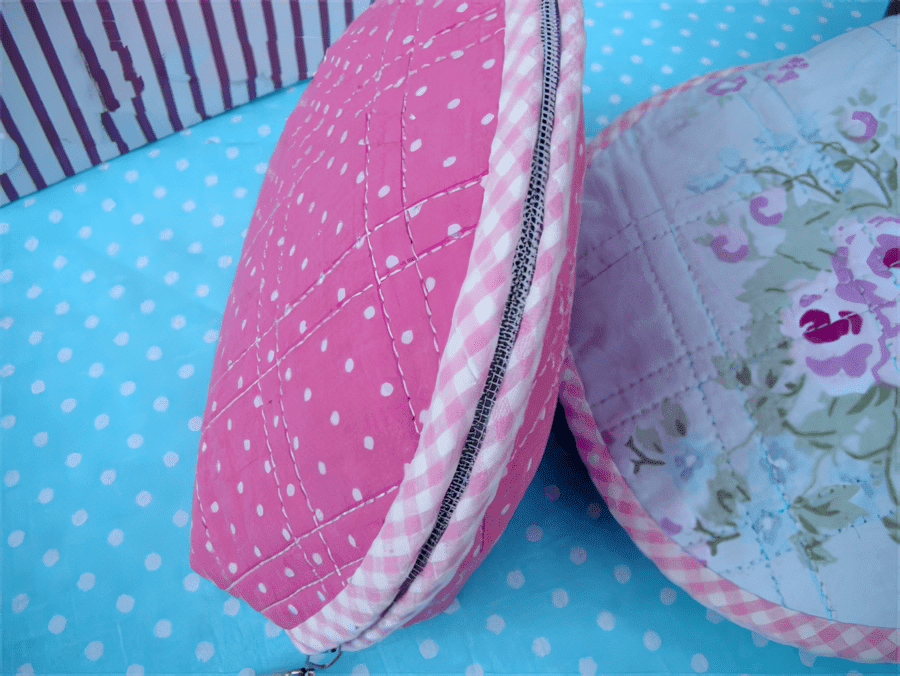
Turn out the front to see if the zipper is hidden enough for a snug fit.


0 comment:
Post a Comment